Gusto to AD (Entra ID) Integration: 7 Simple Steps to Follow
Chad Burggraf6 min read

Does your company use Gusto to manage employees and payroll data? Consider integrating it with traditional, on-premises Active Directory (AD) or cloud-based Entra ID (Azure AD).
Once fully integrated, you can automate actions, process onboarding and offboarding smoothly, and ensure that added employee data is consistent across IT systems.
Below, you’ll learn what Gusto to AD integration entails. This article will also walk you through integrating Gusto into Active Directory. If you’re weighing Gusto against other payroll tools, our HR-to-Active Directory collection shows how each one connects.
Understanding Gusto to AD Integration
Gusto is a popular HR platform that simplifies employee management, payroll, and benefits. It helps HR teams handle complex tasks like filing payroll taxes, meeting IRS requirements, and tracking benefits in one centralized place.
On the other hand, Active Directory is Microsoft’s on-premise directory service. It can manage user identities, control access to network resources, and maintain security within an organization’s IT environment.
Microsoft also offers a cloud-based directory platform called Entra ID (formerly known as Azure Active Directory). It can handle digital identities and user access from any location, as long as you have an internet connection.
Integrating Gusto with either AD environment bridges your important company systems. It allows for automatic user information updates between the platforms. This reduces the need for manual data entry and ensures accuracy without compromising security.
7 Simple Steps to Integrate Gusto to AD
Here’s a straightforward guide on how to connect Gusto to Microsoft Active Directory (Entra ID):
1. Prepare Gusto for Integration
Before starting the integration, you should log in to your Gusto developer account.
Next, head to the page where you can manage your account settings and enable API access.
Scroll until you find the API keys. You’ll need these credentials to allow communication between Gusto and AD.
Then, you must enter a redirect URI to create an application. In this instance, you’ll need to connect it to Active Directory and authenticate the request. Use the https protocol for a secure connection.
It’s also a good idea to review admin permissions to guarantee that only the right people, such as your IT manager, can manage app settings.
2. Set Up Active Directory
Now that Gusto is prepared, it’s time to set up Active Directory to accept data from your HR software.
Make sure your AD is up to date and compatible with Gusto’s integration features.
You should also organize your AD structure to ensure user groups are clearly defined. Use free tools to automate this process.
3. Configure and Sync User Attributes
The next step is configuring the user attributes in AD that you will sync with Gusto.
This involves mapping fields like first name, last name, job title, and department. Doing so ensures that both systems have consistent information.
If necessary, you can also set up custom fields for specific roles or permissions. For example, add a field to indicate whether the employee works on-site or remotely.
Uploading a user profile image in Gusto can automatically reflect in AD. This provides additional details for identification.
4. Connect Gusto to AD via API or Middleware
After preparing both Gusto and Active Directory, it’s time to link them.
You can choose to do this through a custom API key or by using middleware.
Select the method that best suits your organization’s needs and budget.
For example, middleware is better suited for a fully customizable solution that tracks all AD changes.
While it may be costly, the investment pays off in the long run by saving your IT team significant time, effort, and resources.
5. Test the Integration
Once both systems are connected, it’s important to test the integration before rolling it out company-wide.
Run a series of tests by adding and updating users in Gusto’s Sandbox environment. Then, you can check if the changes are accurately reflected in AD (Entra ID).
If everything works as expected, continue with the next steps. If not, troubleshoot any issues before going live.
6. Finalize and Deploy
After successful testing, you can deploy the integration across your organization.
Be sure to inform HR and IT teams about the changes and provide documentation if needed.
Doing so will build confidence in the system and make sure everyone understands how it works.
7. Monitor the Connection
Your job doesn’t stop after deployment. You must regularly check if the connection between Gusto and AD is working correctly.
You can do so by reviewing if the data syncs as expected every month.
Use monitoring tools or middleware solutions to track any errors or sync delays. If issues arise, address them promptly to avoid disruption.
Benefits of Gusto to AD Integration
After learning how to connect Gusto to AD, you may be curious about its benefits. Below are some advantages you can expect from this connection.
Simplify Employee Onboarding and Offboarding
One of the greatest benefits of connecting Gusto to AD is the ability to streamline onboarding and offboarding.
When a new hire joins your company, the HR team will add their details to Gusto.
The integration then automatically creates a new AD account with the same employee information. It can also provide access to the correct tools, allowing for a smoother onboarding transition.
New hires no longer need to sign up for new accounts, fill out forms, or ask the IT team for permission rights. They can quickly become more productive team members, saving your business money.
Thanks to this integration, no-touch offboarding is also easier for IT staff and the departing employee.
Once a worker formally quits the company, their AD account and access to computer systems are instantly deactivated.
They don’t have to turn over important IT resources—the integration automatically does this for them.
Centralize User Management
Integrating Gusto with AD allows you to centralize identity and access management. This gives IT teams a single platform to manage all users across the organization.
Instead of handling employee information in separate systems, the integration makes it possible to take care of everything from a unified platform.
That means any changes in Gusto, such as a new hire or role adjustment, are automatically reflected in Active Directory.
IT managers don’t have to spend time updating user information in multiple places. This minimizes the risk of making a mistake or entering duplicate data.
Reduce Security Risks
Syncing Gusto with AD can significantly reduce the risks associated with unauthorized user access.
Only employees with the right level of access will have access to key applications and sensitive company information.
When an employee’s account is terminated in Gusto, their AD credentials are simultaneously disabled.
This integration reduces the likelihood of outdated accounts being left open, which can lead to data breaches or cyberattacks.
It can improve overall security and keep your organization’s confidential data safer.
Improve IT Efficiency
Integration can improve IT efficiency by automating repetitive tasks. It eliminates the need to enter employee information in multiple systems manually.
It also ensures that user status is always synced between Gusto and AD, which makes it easy to track.
This allows IT teams to focus on more complex tasks that contribute to business growth.
Automate Gusto to AD (Entra ID) Integration With ezOnboard
Configuring Gusto to Active Directory integration manually can be complex and time-consuming for most IT teams. Fortunately, ezOnboard offers an automated solution to simplify this task.
It seamlessly integrates an organization’s HR software (such as Gusto) with on-prem Active Directory or cloud-based Entra ID (Azure AD). Once both systems are connected, it can reduce manual oversight, enhance security, and save valuable time.
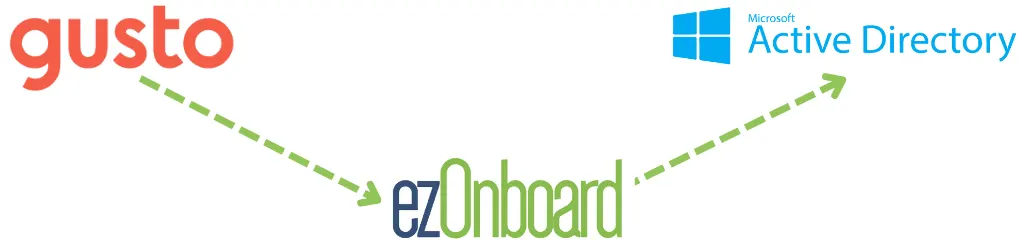
With ezOnboard, you can transform the traditional, often cumbersome, onboarding and offboarding processes into more efficient and error-free operations.
To get started, request a demo or check the ROI calculator to see how much money ezOnboard can save you.
FAQs About Gusto to AD
What is Gusto?
Gusto is an online HR platform that handles payroll compliance, benefits, and taxes. It provides time tracking, onboarding, and talent management features.
What are the integration requirements for connecting Gusto to AD?
You need API access in Gusto and an updated Active Directory (Entra ID) environment. Make sure you have admin permissions to both systems to configure integration settings.
How to maintain Gusto to AD integration?
Monitor the sync regularly to guarantee data consistency. Update Gusto and AD configurations when needed to keep the integration running smoothly.